How to connect ESP32 microcontroller to WIFI network
In this post we'll connect our ESP32 microcontroller to a WIFI network. We'll use the Arduino IDE to write the code and upload it to the ESP32 microcontroller. Then we'll add some LEDs to display the status of the WIFI connection. Then we'll learn how to use secrets to store the WIFI credentials in a separate file.
What we'll need
Hardware setup
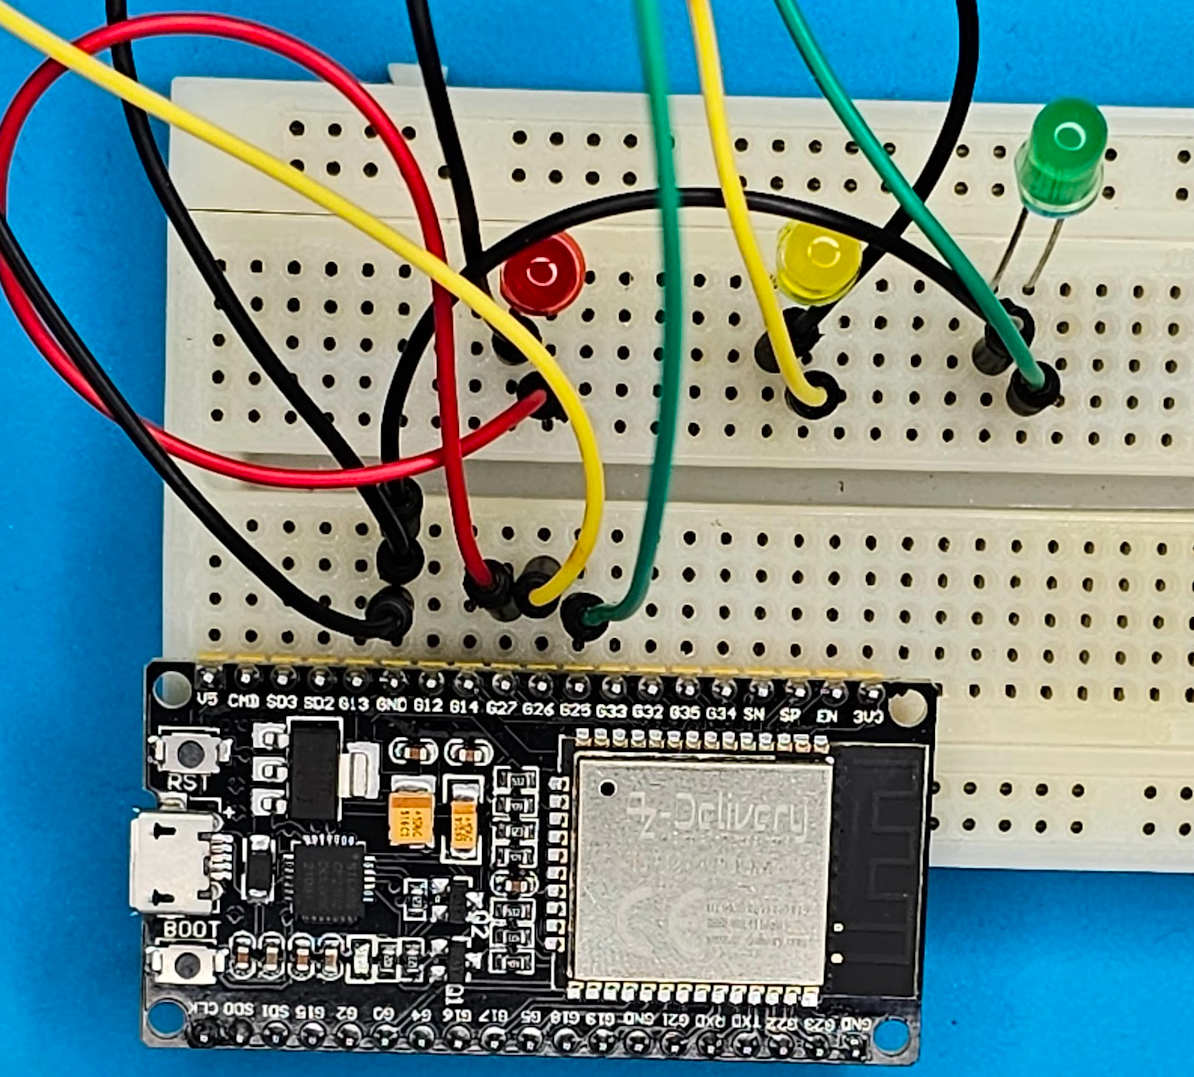
- Put your ESP32 microcontroller on a breadboard.
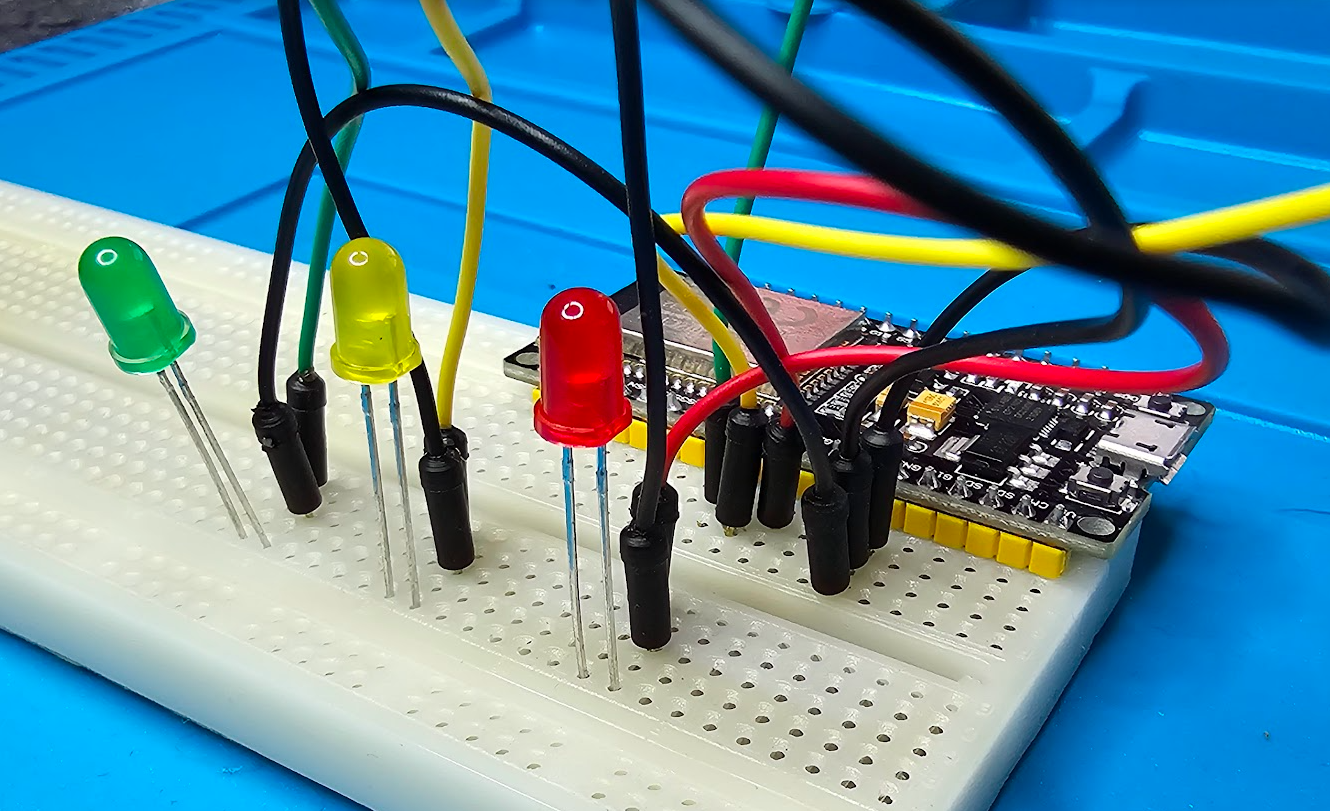
- Place three LEDs on your breadboard, but make sure that the shortest pin is connected to one of your GND pins of your ESP32 microcontroller.
- Connect the longest pin of the LEDs with the G25 (green LED), G26 (yellow LED) and G27 (red LED) pins of your ESP32 microcontroller.


Code for sketch
Create a new sketch in the Arduino IDE and add following code
#include

const char* ssid = "your-wifi-network-name";
const char* password =  "your-wifi-password";

void setup() {
  Serial.begin(9600);

  WiFi.begin(ssid, password);
  Serial.println("Connecting to WiFi..");

  while (WiFi.status() != WL_CONNECTED)
  {
    delay(500);
    Serial.println("Connecting...");
  }

  Serial.println("Connected to the WiFi network");
  // Print local IP address
  Serial.println("");
  Serial.println("WiFi connected.");
  Serial.println("IP address: ");
  Serial.println(WiFi.localIP());
}

void loop() {
}
Compile and upload the sketch to the ESP32
Upload the code from the Arduino IDE to the ESP32 microcontroller by clicking the upload button.
Successful uploading will lead to output similar to the image below, though with a different IP address.

To test if everything works, you can open terminal and ping the IP address of your ESP32 microcontroller.

Add LEDs to display the status of the WIFI connection
Now we'll update the code to display the status of the WIFI connection using the LEDs.
#include

const char* ssid = "your-wifi-network-name";
const char* password =  "your-wifi-password";

const int greenLedPin = 25;
const int yellowLedPin = 26;
const int redLedPin = 27;

void setup() {
  Serial.begin(9600);
  pinMode(greenLedPin, OUTPUT);
  pinMode(yellowLedPin, OUTPUT);
  pinMode(redLedPin, OUTPUT);

  WiFi.begin(ssid, password);
  digitalWrite(redLedPin, HIGH);
  Serial.println("Connecting to WiFi..");

  while (WiFi.status() != WL_CONNECTED)
  {
    digitalWrite(redLedPin, LOW);
    digitalWrite(yellowLedPin, HIGH);
    delay(500);
    Serial.println("Connecting...");
  }

  digitalWrite(yellowLedPin, LOW);
  digitalWrite(greenLedPin, HIGH);

  Serial.println("Connected to the WiFi network");
  // Print local IP address
  Serial.println("");
  Serial.println("WiFi connected.");
  Serial.println("IP address: ");
  Serial.println(WiFi.localIP());
}

void loop() {
}
Compile and upload the updated sketch to the ESP32
Upload the code from the Arduino IDE to the ESP32 microcontroller by clicking the upload button.
If evertyhing went well, you should see the LEDs light up in the following order:
- Red LED
- Yellow LED
- Green LED
See my setup in slowmotion:

Add secrets to store the WIFI credentials in a separate file
You should never store your WIFI credentials in a public file. So we'll use secrets to store the WIFI credentials in a separate file. This file will not be uploaded to Github so you'll have to add it to your .gitignore file.
Enhance security by creating a separate secrets file to store Wi-Fi credentials. Follow these steps:
1. Create a file named secrets.h and add the following code:
#pragma once

#define WIFI_SSID "your-wifi-network-name";
#define WIFI_PASSWORD "your-wifi-password";
3. Update the main sketch code to reference the secrets:
#include
#include "secrets.h"

const char* ssid = WIFI_SSID;
const char* password =  WIFI_PASSWORD;

const int greenLedPin = 25;
const int yellowLedPin = 26;
const int redLedPin = 27;

...
Upload the code from the Arduino IDE to the ESP32 microcontroller by clicking the upload button en test again.
After uploading, your setup should function as expected.
In this guide, you've learned how to establish a Wi-Fi connection on your ESP32, visually represent its status with LEDs, and safeguard your credentials using secrets. Feel free to explore further and build upon this foundation for your projects. Happy connecting!
Want to know more?
See all my other posts about the ESP32 microcontroller.